You might be here to learn more about your own yoga practice or to learn how to teach yoga chair yoga. Either way, welcome! At Soul Strong Yoga, we love love accessible yoga and using a chair can make yoga accessible to people with office jobs, mobility restrictions, vertigo, balance issues and more.
Watch Now: A Free Chair Yoga Class with Soul Strong Yoga Teacher, Maura Dunn!
Here’s a quick lesson on the history of chair yoga:
Chair Yoga is a gentle and modified form of therapeutic yoga that is practiced using a chair to sit, stand, or for support. Created by Lakshmi Voelker, the founder of Siddha Yoga and has over 50 years of experience in Yoga, in 1982 to cater to the needs of students who have limited mobility due to age, injuries, or disabilities.
What are the Benefits of Chair Yoga?
Lower stress hormones, a sunnier outlook, and a healthier body to name a few! A modified exercise does not mean you are getting less benefit or you are cheating on your workout. Like any exercise with many variants, Chair Yoga is just a different version of yoga that is easier to the joints and low impact but still serves to help increase flexibility, strength, calm the mind, and can be a good stress reliever. It’s ideal for beginner yoga students, those with desk jobs, and seniors because of its convenience and attention to self-care.
Also, Soul Strong Yoga co-founder, Julie, is a huge fan of chair yoga! Julie has Myasthenia Gravis and enjoys chair yoga when she’s experiencing muscle weakness, balance issues, and dizziness.
How to do Chair Yoga?
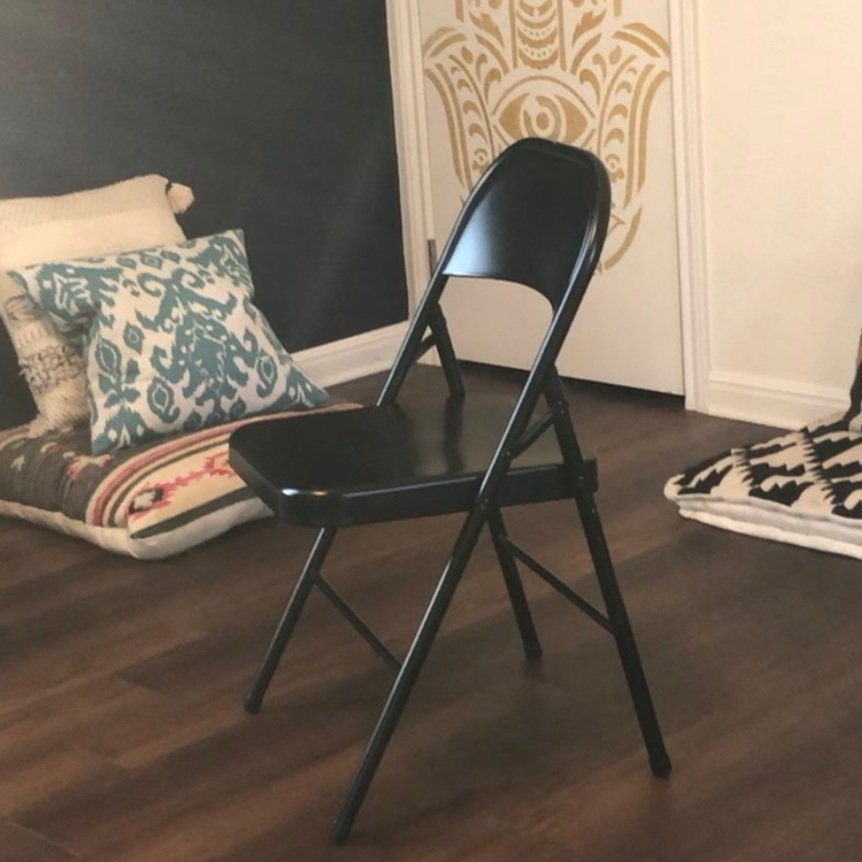
First on the list is to find a sturdy chair. It’s best to choose a chair that has no armrest so that your arms will not be restrained, with a straight back post to prop up your back. Chairs with wheels have a hazardous potential because of their likelihood to move or slip beneath you when you do your poses. If there is no other option, like for example, you are in the office or in a wheelchair, then it would be safer to lean your chair on a corner wall to stabilize the wheels, or if there is a lock, secure it.
The second step is to determine and learn chair yoga poses that fit your health and fitness goals.
Ready to start Chair Yoga? Check Out these Fabulous Chair Yoga Poses:
Seated Chair Cow-Cat Pose (Marjaryasana-bitilasana)
Benefits: Stretches and releases tension on the back, neck, shoulders, hips, and abdominal muscles.
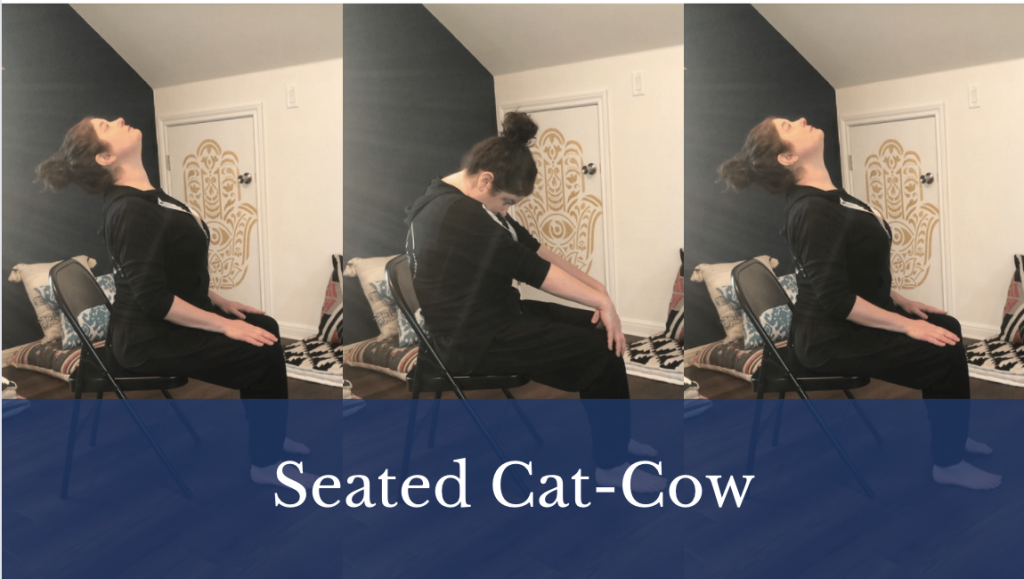
Method: Sit on your chair with your feet flat on the floor, your back straight, and place your palms on your thighs. Move slightly away from the back of your chair to have more room for the pose. As you take a long exhale, lean your body towards your knees, contract your stomach in, and round your spine. Your chin on your chest and arms straight. Hold the pose for a few seconds and as you slowly inhale expand your belly, arch your back and your pelvis lifted forward. Look up at the ceiling if it’s comfortable, relax your jaw and you may close your eyes to focus on the stretch. Take slow and steady breaths and repeat.
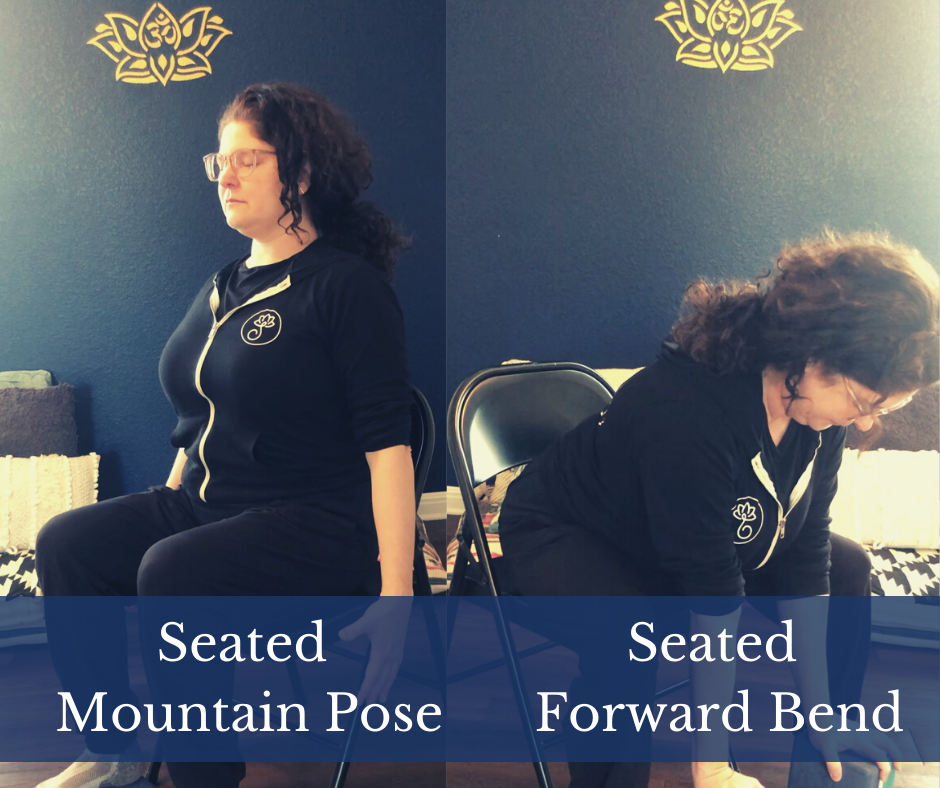
Seated Chair Mountain Pose (Tadasana)
Benefits: Helps correct posture, improves balance, and focuses on exercising the arms, shoulders, and chest.
Method: Position your body on the middle of your chair, your spine in a neutral position and your head erect. Place your feet on the floor, parallel to each other, lift your abdomen and chest (as if you are zipping a zipper). Roll your shoulders back, your hands on your side facing upwards, your pelvis forward, your stomach is tight and engaged. With your chin level to the floor, relax, close your eyes and take a couple of deep breaths.
Seated Chair Forward Bend (Uttasana)
Benefits: Strengthens the spine and improves mobility. It can stimulate the shoulder, abdominal, and quad muscles and helps with reducing fatigue.
Method: Sit near the edge of your chair, your back straight, your feet parallel on the floor, and hands on top of your knees. Take a slow breath and as you exhale, gradually lean your chest forward and towards your knees. Drop your upper body towards the floor and suck your abdominal muscles in. Keep your head aligned with your shoulder. Breath easily. Based on your comfort and flexibility, you can bend more forward, the tops of your fingers or palms touching either on your toes or floor, and your neck and spine aligned for a deeper stretch. Hold the stretch for a few breathes and sit up slowly. Repeat as much as you need.
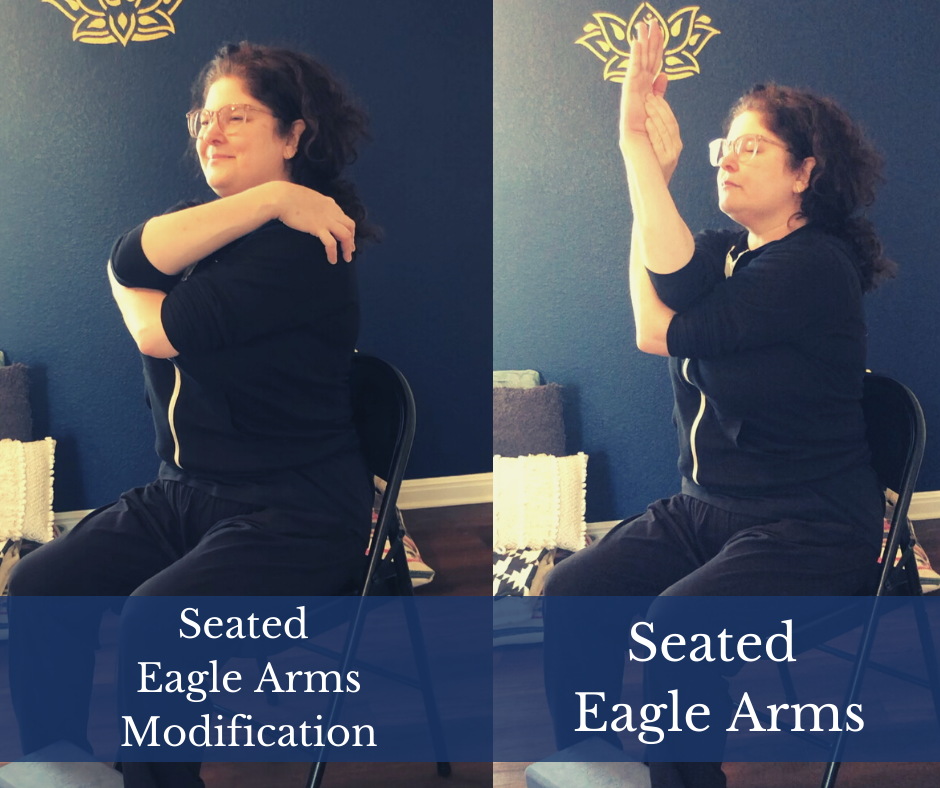
Seated Chair Eagle Arms (Sukhasana Garuda Arms)
Benefits: Activates the shoulder joints and boost elbow circulation. A good choice for those who have arthritis in the arms or hands.
Method: Sit comfortably with your spine erect. Raise your left hand in front of your face, cross your right arm and clasp your left hand, intertwining your elbows together. Lift your elbows, feeling the stretch on your right triceps, biceps, and shoulders. Inhale deeply and exhale slowly for a couple of repetitions and replicate steps on the other arm.
Seated Chair Upward Hand Stretch Pose (Urdhva Hastasana)
Benefits: Reduces the tension on the neck, abdomen, and both upper and lower back. Improves mobility of the arms and shoulders.
Method: Begin by sitting tall, your back straight, feet grounded on the floor, a few inches apart and arms on either side of your body. Inhale and slowly raise your arms sideways, your palms facing up the ceiling, and bring them above your head, making sure that your arms are extended and straight. Bring your palms together, still facing upward, and interlace it. Exhale and pull your shoulders down while stretching your arms up. Remain in the stretch for a couple of breaths.
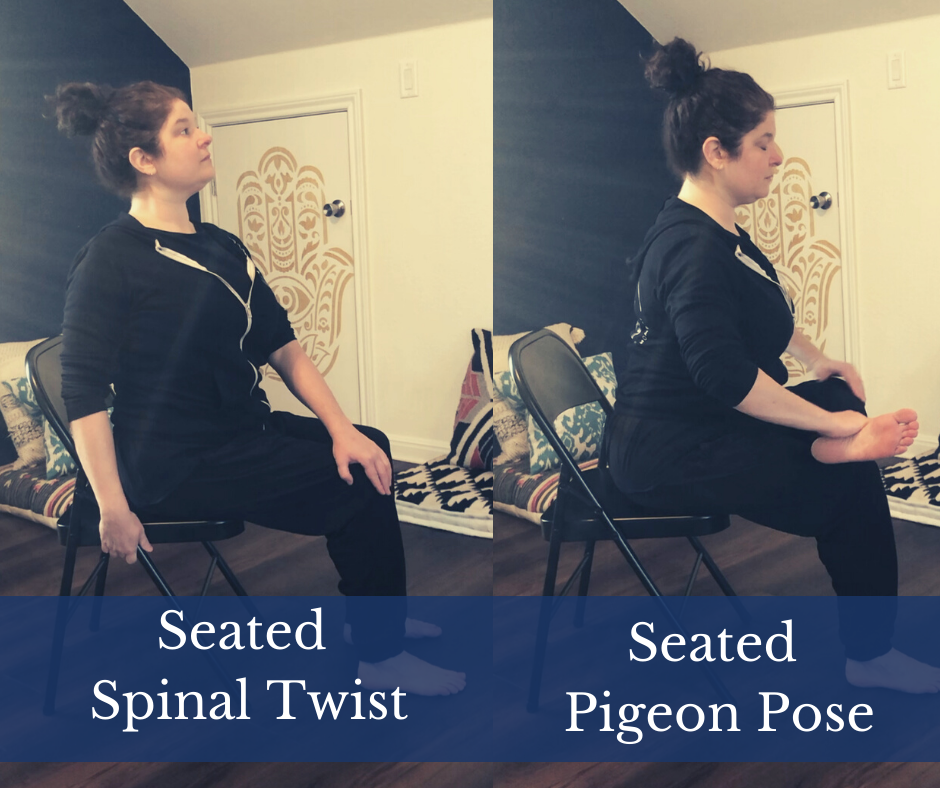
Seated Chair Spinal Twist (Parivrtta Sukhasana)
Benefits: Softens and loosens the back and upper chest. Builds flexibility on the neck, shoulders, and torso.
Method: Prepare your body by sitting straight, your shoulder relaxed and feet planted on the ground, slightly apart. Inhale and slowly put your right arm up, twist your torso to the right, towards the back of your chair. Rest your right arm on top of the back of your chair while your left hand is on your thighs. Your head may follow the direction of your twist but if it causes the problem, focus your eyes in front of you. Stay for several breaths, then drop your arm, turn around and return to the center position. Repeat on the other side.
Seated Chair Pigeon Pose (Kapotasana)
Benefits: Ideal in alleviating tightness of hamstring, knees, glutes, back, and hips due to sitting for long periods of time. Stretches the groin and thighs, and may help with urinary disorder.
Method: Start with sitting up straight, your back off the backrest of your chair, and your knees together. Cross your right leg and rest your ankles to your left knee. Make sure that your right foot is flexed. Using your right hand, cradle your right knee and your left hand supporting your right foot. Lift your back as tall as you can and gently lean forward until you feel the stretch on your right glute, hips, and back. Don’t forget to breathe during the pose and engage your stomach muscles. Hold the stretch for about 3-5 breathes. Gently drop your right leg, turn around and return to the center position. Repeat with the other leg.
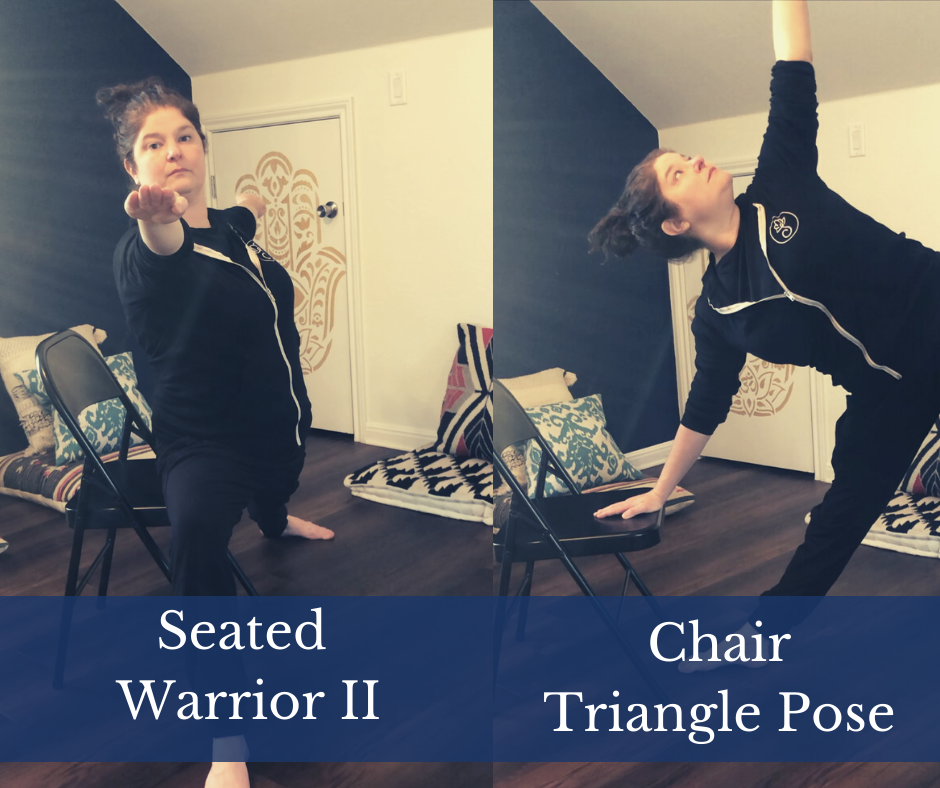
Seated Chair Warrior 2 (Virabhadrasana 2)
Benefits: Opens up the groin, legs, and hips. Strengthens back muscles, hamstrings, and arms. Encourages blood circulation and body stability.
Method: From your seated Mountain Pose, slide sideways to your right. Hook your right knee over the leg of your chair and rest your right arm to the backrest of your chair for support. Extend your left leg, your toes on the floor. Depending on your mobility you may keep your leg bent and aligned to your hip or have it straight. Reach your fingertips away from each other with long arms parallel to the floor. Hold for multiple breaths, release, return to center and repeat to the other side.
Standing Triangle Pose with a Chair for Support (Parsvottonasana)
Benefits: Stretches side waist, hips, and hamstrings. Reinforces core muscle and loosens the chest and shoulders.
Method: Stand in front of the seat of your chair. Point your right toes towards the seat of the chair with your right leg straight. Inhale and raise both arms to shoulder level. On your exhale, take your right hand down to the seat of your chair. Reach your left hand towards the sky. Stay in the position for 3 breaths. Go back to an upright position with arms raised and repeat to the other side.
Seated Chair Savasana
Benefits: As the final resting pose at the end of a yoga class or practice, its main purpose is to relax the body and to concentrate on your breathing to set the mind at ease.
Method: Lean back towards your chair, using the backrest as support to your spine. Relax your arms and your entire body. Make yourself as comfortable as possible and close or soften your eyes. Focus on your breathing and find tranquillity.
Interested in Teaching Chair Yoga?
Soul Strong Yoga’s Online Yoga Teacher Training is a wonderful option if you are not yet certified to teach yoga – we have a fantastic Teaching Chair Yoga Workshop with Maura in the 200 hour online teacher training. This will give you a great intro to teaching chair and adaptive yoga! We also include a Modification and Props Workshop with Julie that is an excellent introduction to teaching adaptive yoga.
If you already have your 200 Hour Yoga Teacher Certification, we love Sherry Zak Morris and recommend you check our her Chair Yoga Teacher Certification program. Also, for general information how to integrate yoga into your daily routine, check out this article.